One of the easiest vegetable to grow is Mung bean sprouts or taugeh and it is actually cheaply sold in markets too. But for some reasons, despite being easy, most people I know don’t really know how to make them, or rather, don’t care to make them, especially the new generation like myself. It is easy to make. All you need is, mung beans (obviously), water, proper container, and pieces of gunny cloths.
Actually, I’d never made taugehs in my life and I didn’t really know how to make it. But out of curiosity, I’d been reading and watching the how-to videos on taugehs and decided to make it my own way. So here it went:
First of all, soak mung beans over night. You don’t need much of them as a small amount will significantly expand in volume once they’ve drank up water over night. In this first batch, I only used around 100gms or so, for experiment purpose.
Mung beans day 1
This are the mung beans that had bean soaked over night and wrapped in wet cloth. Tiny roots start to shoot out.
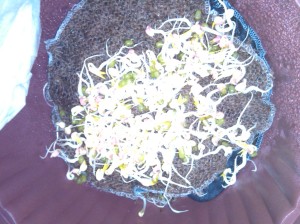
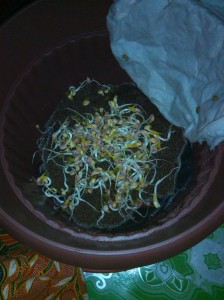
Mung beans day 2, transferred into newly made container
On the second day, I decided to make a proper container specially for mung bean making. I had already available, plastic pots which I had bought for gardening. As plant pots have holes at the bottom, they make perfect container for taugeh making. Then, I rummaged through my mom’s recycle boxes and found old gunny sacks and cut them to fit in the pot for layering.
However, notice that my taugehs are all over the place, not growing tall in unison, root at the bottom and shoots the top? This is because, when I transferred the sprouts to the new place, they were all halfway ready. Anyways… Better late than never kan?
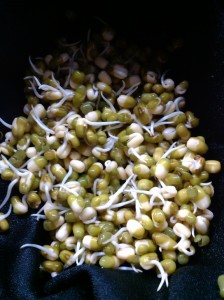
The sprouts day 3
On the third day, they are much bigger and the volume has expanded. And they are ready. Oh yeah, there are two important things to remember when making taugeh: water vigorously twice a day but make sure that they don’t soak, I mean, good drainage is important or else.. hehehehe… and second, make sure that they don’t get exposed to light or they will turn green; that is why I had covered the top of the taugeh pot with cloth – no light gets in but they still get the oxygen they need, I mean, just putting a piece of cloth (I used face towel as the pot cover) the pot is not airtight and thus the taugeh could breathe.
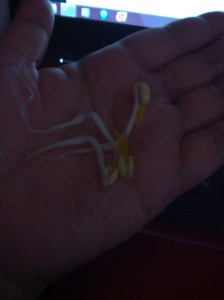
Ready to be consumed.
This is the finished products.. As it is really late in the night, I’ll cook them tomorrow. Yes I know they are not as plump gemuk2 like those you’d find in the pasar, but home made taugeh is fresh, and definitely organic. No chemicals added. Plain and simple
I’ll make another batch soon.


